Windows System
1.Windows Vista、7、8、8.1、10 System
All of Windows Vista, 7, 8, 8.1, 10 systems have preinstalled IPv6, and thefollowingprocedures take Windows 10 and Windows 7 for example in order to check the attributes of network connections.
1.1Windows10系统
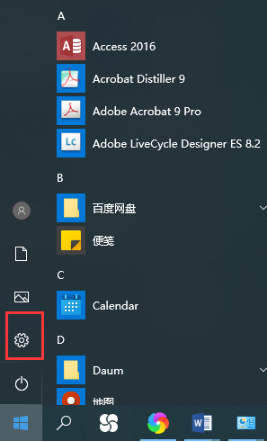
(1)For Windows 10, click the icon“Settings”in the start menu of the system.
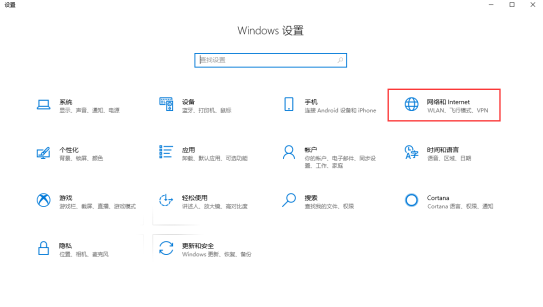
(2)Select“Network and Internet”
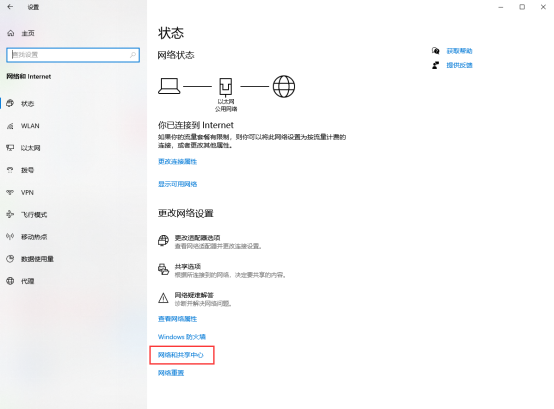
(3)Select“Network and Sharing Center”.
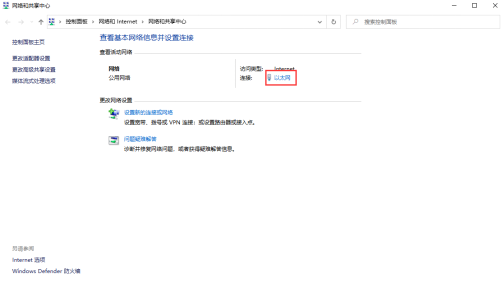
(4)Select“Ethernet”.
(5)Select“Attributes”.
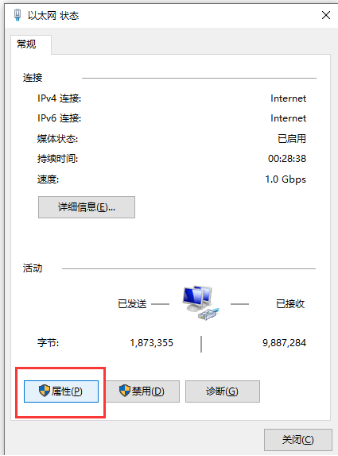
(6)Make sure that protocol version 6 of Internet (TCP/IPv6) can be found in the list and selected. Then double click“protocol version 6 of Internet”.
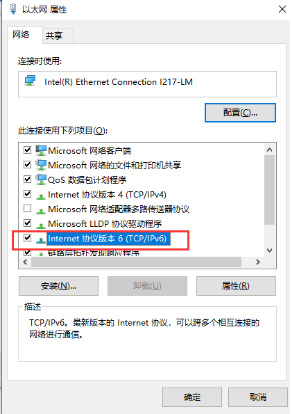
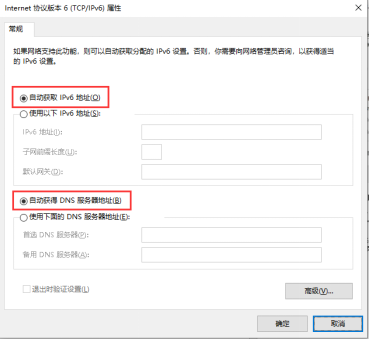
(7)Select automaticacquisitionof IPv6 protocoladdressand automaticacquisitionof DNS service address.
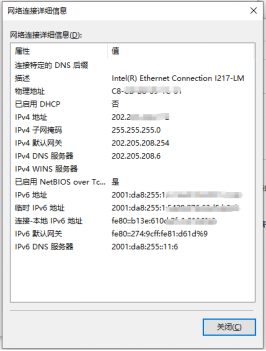
(8)Click “Confirmation”to go back to“Ethernet Status”, and click“Detailed Information”. If IPv6 address is displayed, it proves that IPv6 is successfully installed.
1.2Windows7 System
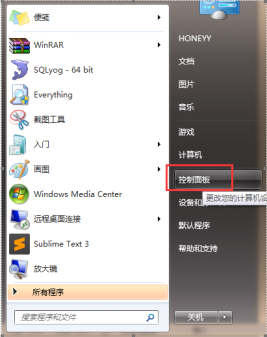
(1)Click“Start Menu”in the lower left corner, and click“Control Panel”in the menu.
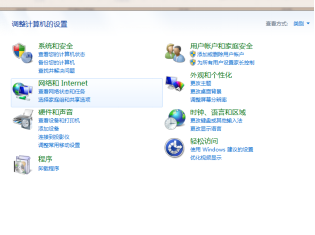
(2)Click“Network and Internet”.
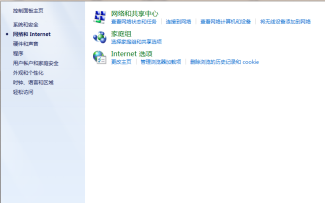
(3)Click“Network and Sharing Center”.
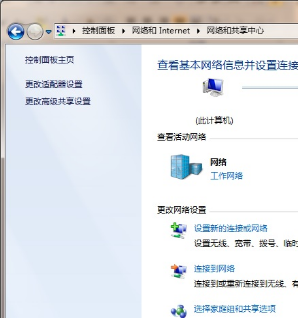
(4)Click“Change Adapter Settings”.
(5)Click on the key of“Attributes”. (Note: this local connection is only a name, and different computers have different names.)
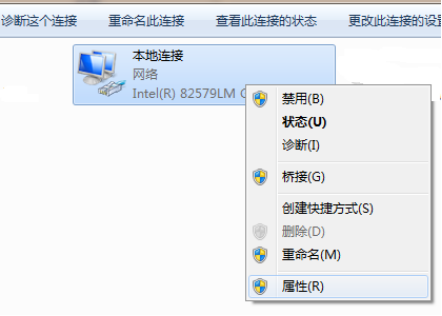
(6)The system will list all of the protocols and service options, make sure‘Internet Protocol Version 6 (TCP/IPv6) can be found in the list and selected.
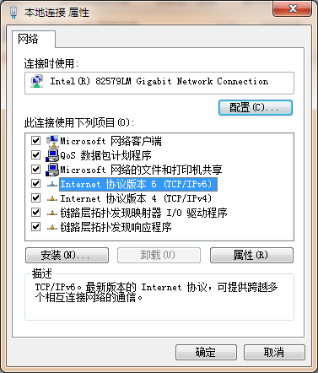
(7)If the item of“Internet Protocol Version 6 can be found in the list, then click“Confirm”to get back to“Local Status”and click“Detailed Information”.
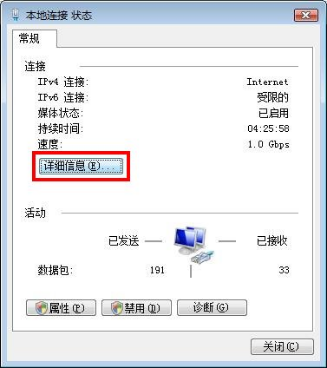
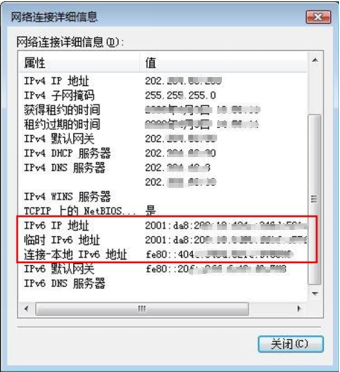
(8)If IPv6 address can be displayed, it proves that IPv6 is successfully installed.
2.Windows 2000, 2003, XP Systems
Windows 2000, 2003 and XP system do not default support IPv6, so IPv6 needs to be installed manually.Take Windows XP for example to illustrate installation steps.
2.1Installation Setting of IPv6 on Windows XP
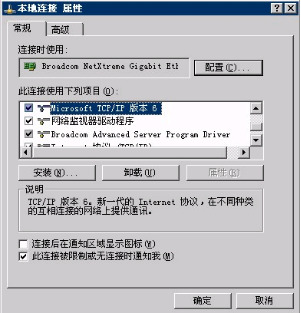
Start“Network Connections”in“Control Board, select“Local Connection-Attribute”, click“Install”, select“Protocol”, and add“Microsoft TCP/IP Version 6”. Installation steps are illustrated in the picture. (Attention: the names of local connection can be changed if there is such a need; it can also be wireless connection and operation steps are identical).
(1)Start“Control Panel”and select“Network Connection”.
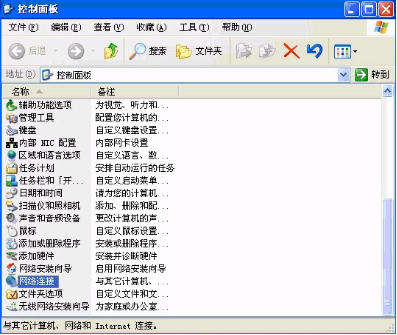
(2)Select“Network Connection”to configure.
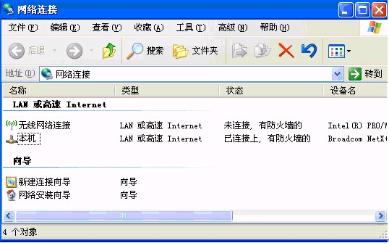
(3)Click“Install”button.
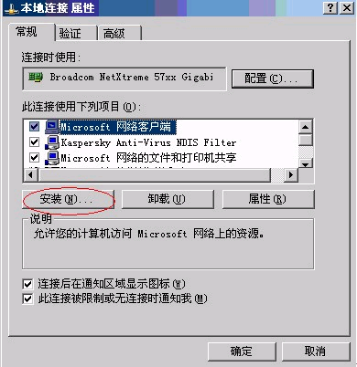
(4)Select“Protocol”and then click“Add”.

(5)Selectinstallationof“Microsoft TCP/IP Version 6 Protocol”, and click“Confirm”.
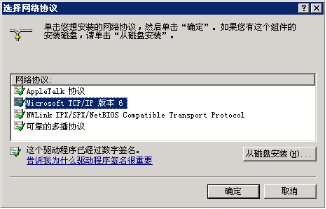
(6)Installation Successful.
Apple MacOS System
Mac OS X (10.3 and subsequent versions) default supports IPv6, and check only the attributes of network connection.
(1)Select“System Preference Setting”in the Apple menu and click on“Network”.
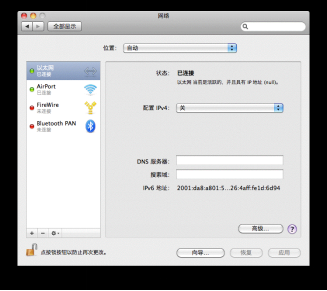
(2)Select network service you want to use in conjunction with IPv6, for example,Ethernetor AirPort.
(3)Click and press“High-level”, then click and press TCP/IP.
(4)From the pop-up menu of“Configure IPv6”, select“Automation”.


