General computers, after installing correctly network card, Internet setup by default is to use DHCP to surf online.If set up with a static IP address to surf online, you need to change back to DHCP to surf online.Different operating systems vary.For details, please check use instructions.
DHCP setup in Windows XP
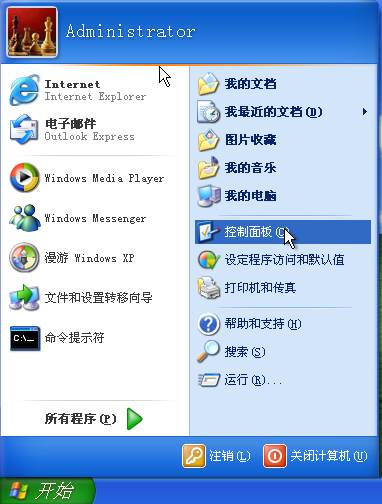
Click“Start”in the menu then click“Control Pad”option in the menu.
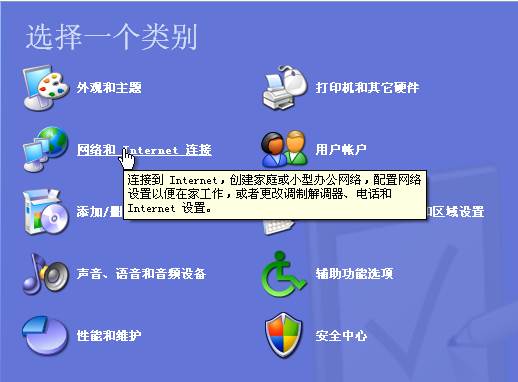
Start“Internet and Internet Connection”in control panel.
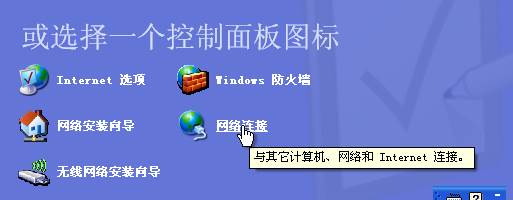
Start “Internet Connection”in“Internet and Internet Connection”.
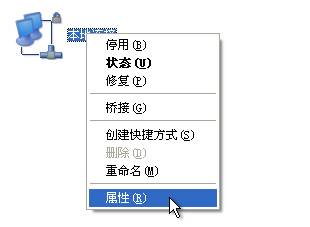
SingleClick right“Local Connection”in“Internet Connection”, and select“Attribute”in the pop-up menu.
Select“Internet Protocol (TCP / IP) in“Local Connection”attribute, and click“Attribute”
The above 5 steps can be achieved through the following ways:
Find“Internet Neighbor”on the desktop, single click right on“Internet Neighbor”, and select the option of“Attribute”in a pop-up menu.
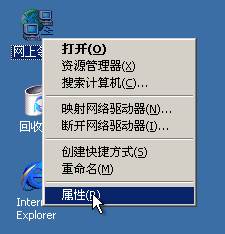
In the pop-up box, find“Local Connection”, single click right“Local Connection”, and select“Attribute”in the pop-up menu.
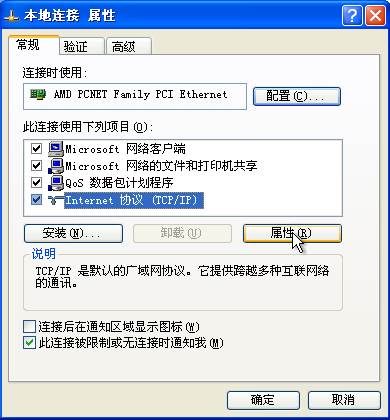
After the above steps, the following is
In the pop-up box of Internet protocol, click“Automatic Acquisition of IP Address”and“Automatic Acquisition of DNS Server Address”.
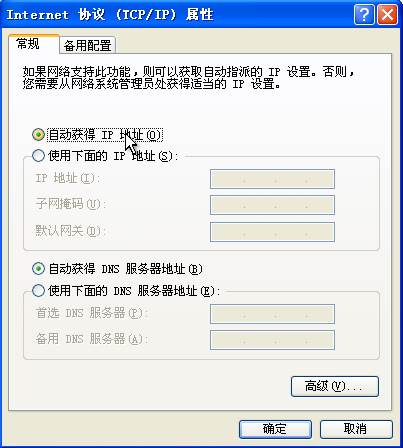
Click twice“Confirm”button.
Special attention:
Authentication client setup
In the authentication client, set up DHCP, and set up DHCP use mode.Afteracquiringauthentication, confirm.
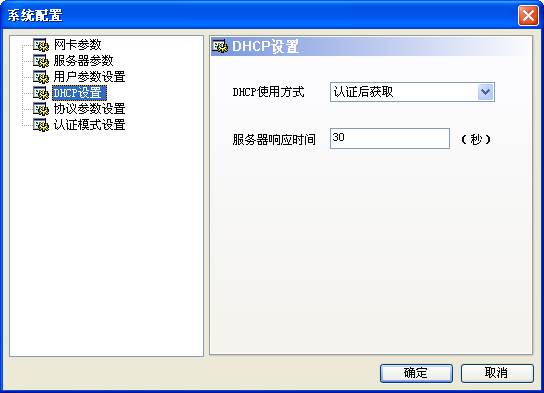
DHCP setup in Windows 7
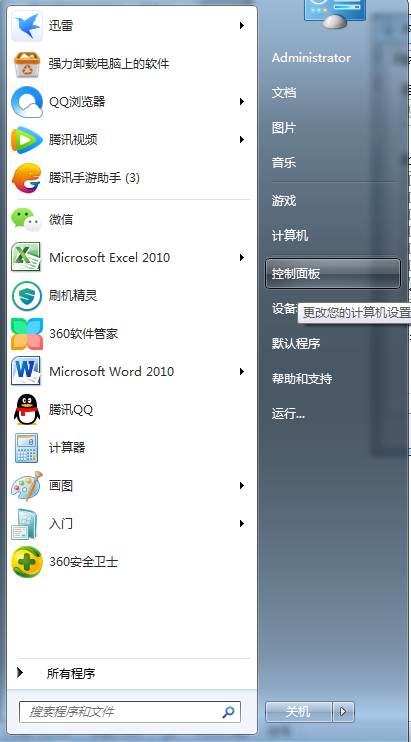
Click“Start“in the menu, and clickmenu item in “Control Panel”.
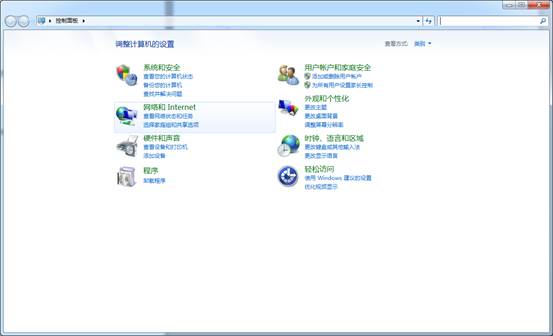
Open“Internet Connection”in control panel.
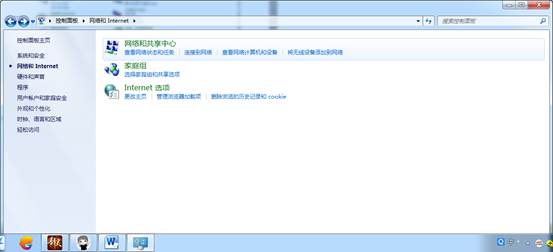
Open“Internet and Sharing Center”in“Internet and Internet Connection”.
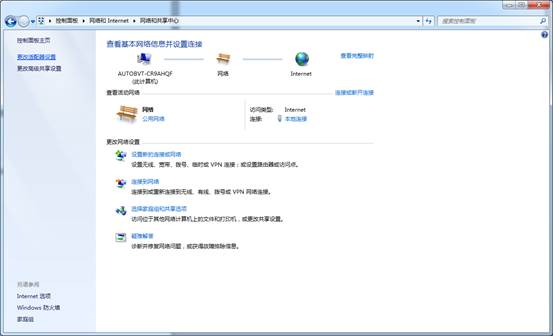
Single click right“Change Adapter””in“Internet and Sharing Center”.
Click right“Local Connection”in Internet connection, and check attribute.
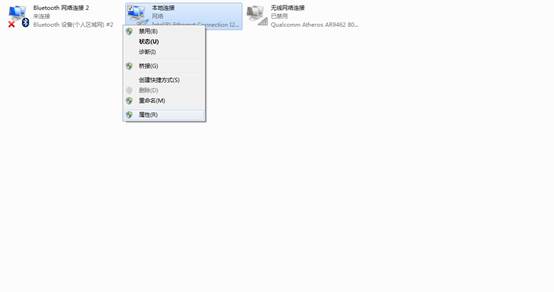
Single click“Internet Protocol Version 4”in“Local Connection”and click attribute.
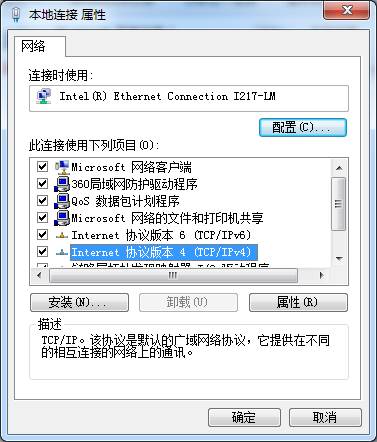
After the above steps, the following is
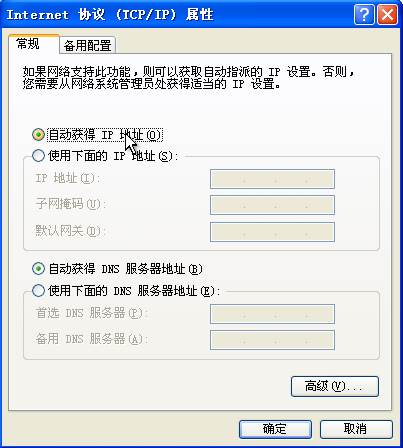
In the pop-up box of Internet Protocol, click“AutomaticAcquisitionof IP address”and“Automatic Acquisition of DNS Server Address”
DHCP Setup in Windows 10
Click“Start”in the menu and click menu option in“Control Panel”.
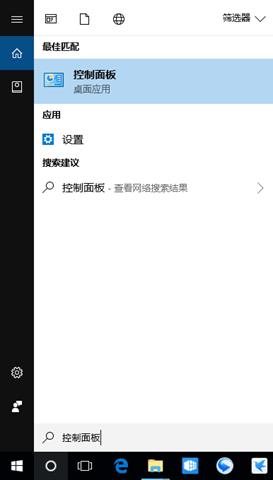
Start“Internet and Local Connection”in control panel.
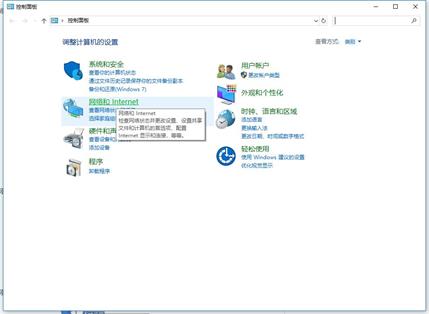
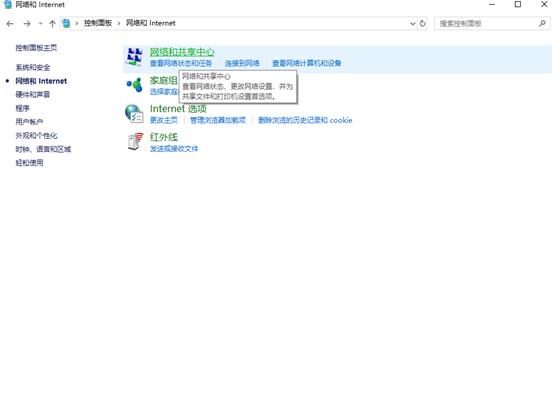
Start“Internet and Sharing Center”in“Internet and Internet Connection”.
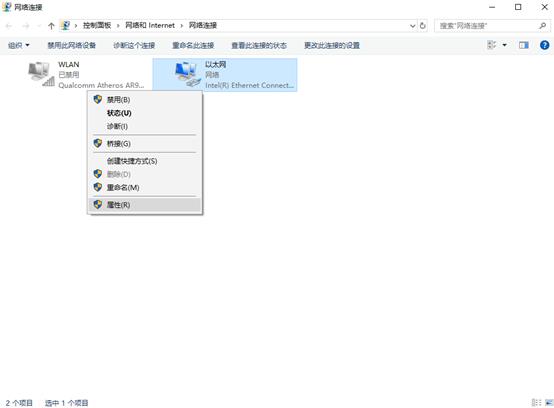
Single click right“Ethernet”in“Internet Connection”, select“Ethernet Connection”in“Attribute”in the pop-up menu.
Select“Internet Protocol (TCP / IP) in the attribute of“Ethernet”, and click“Attribute”.
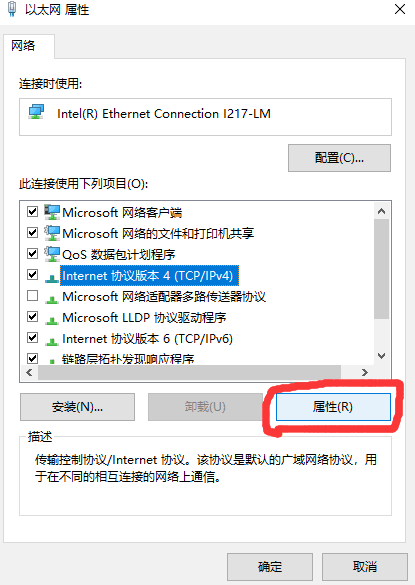
After the above steps, the following is
In the pop-up box of Internet protocol, click“Automatic Acquisition of IP Address”and“Automatic Acquisition of DNS Server Address”.
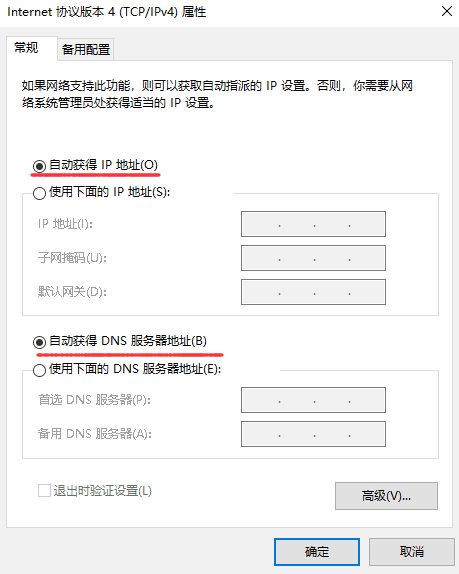
Click twice“Confirm”button.


